Moving Through an Acceleration Progression
Throughout the initial episodes of my new podcast, The Business of Speed, I have discussed the evaluation process for speed training, as well as, my initial acceleration progression. In this article I will discuss that progression and include detailed instruction and videos as to why I use these drills in this order.
Any of my speed work begins with this acceleration progress in one iteration or another. The reason for this is that any speed training that is performed must achieve some relative maximum velocity, however, if the athlete is unaware of how to achieve this position then any attempt of max velocity training prior to acceleration training is fruitless.
As I begin to outline this acceleration progression you will notice a few themes:
(1) I use a top-down approach to my acceleration work. We begin with drills in a fully extended position. We then work into starting positions that involve varying degrees of flexion and ultimately a lower center of gravity.
(2) Our drills progress from relatively slow to fast. From a motor learning standpoint it is much easier to learn and hone a new skill while in a controlled and slow environment prior to speeding up the drill. We do this with our initial drills.
As we begin to introduce athletes to this progression we are coming off of their evaluation which gives us a lens to view these drills through. This means that we are already looking for specific indicators that we saw in the evaluation, however, we are continuing to assess and evaluate as we progress through these drills as we continue to gain insight as the body performs under load and velocity.

We will begin our acceleration progression with Wall Sprints. This is a drill that is used by many coaches. Often times it can be used haphazardly or too quickly to truly glean benefit from it. When performed correctly this drill should teach the athlete the proper position:
Forward Body Angle, approaching 45*
Neutral Spine Position (Body flat, eyes fixed on corner of wall and floor)
Knee elevated so knee and hip approach 90*
Front foot positioned under thigh
Rear heel elevated
This drill is also a great assessment tool for coaches. As the athletes are performing the movements there are a few key areas to observe:
Ankles- Are they able to maintain a plantar-flexed position or do they drop/ collapse at touchdown?
Knee/ Hip- Do they achieve extension at the moment of touchdown? Do they lack extension? Do they extend after touchdown? Is there complete extension followed by subsequent flexion while holding position?
Hips/ Low Back- Does the lumbar spine flex and extend during stride? Is there a noticeable elevation in the hip as the knee moves to front-side position?
Spine- Is there flexion during movement? Is there extension during movement? Is there lateral flexion or excessive rotation throughout movement?
All of these questions should go into a coach’s evaluation process while observing their athletes perform this drill.
After the athlete and coach have seen full benefit from this drill we will move to our Sled March/ Run drills. These drills use the context of the Wall Sprints to now create locomotion. The benefit of the sled drills, compared to sprinting, is that the coach can control the speed of the movement in order to further fine-tune the position prior to beginning the acceleration drills.
When performing the Sled March and Sled Run drills we are cuing the same positions that we first taught during the Wall Sprints. We will begin with the March, then move to the Run. The goal here is not the speed of the sled. In all actuality, I cue our athletes to keep the sled at the same speed for both drills. This speed is typically my walking pace. As they go through these drills I will walk beside them providing feedback as they go. A few issues we tend to come across include:
· Extension at the Cervical Spine (Head up)
· Over striding (Foot landing too far forward)
· Rotation at hips (Reaching for next step)
Any of these issues can be addressed in real-time while the athlete is performing these drills. By fixing these issues in this fixed environment the process of beginning the acceleration drills will be much smoother as athletes have already felt the position they need to achieve.
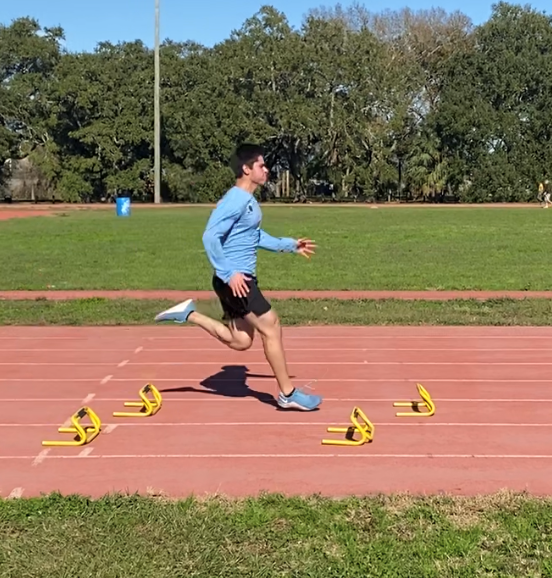
From the sled drills I will then move to the first of our acceleration drills. We begin with a Tall Falling acceleration. I prefer falling starts to help athletes find the proper acceleration position, promote proper shin angle and prevent any false steps. The Tall Falling acceleration also helps athletes to feel the triple extension position as they move into front side position on the opposing side. As an assessment tool this also helps me to see if the athlete is able to maintain extension while going into the first stride. It is not uncommon to see the athlete flex at the knee, hip, and thoracic spine in an attempt to move the knee to the chest more quickly. I will use this Tall Falling Acceleration drill over a 5-10 yard distance to help them become accustom to the first and second step. When I see that they are controlling the posture of the Tall Falling acceleration I will then move them to an Athletic acceleration.

In the Athletic acceleration the athletes begin in a semi-flexed position at the ankle, knee, and hip. This now forces the athlete to create extension through their first step. The Tall Falling acceleration aided in the ability to focus on the front side leg. Now the Athletic acceleration allows the athlete to focus on the backside leg reaching full extension through the first push. As we incorporate the Athletic acceleration we will begin by incorporating it at 10 yards and slowly progress to 15 yards. This position will allow me to begin speaking to the athletes about their shin angle and how it affects their ability to create horizontal versus vertical forces. By doing so we create a dialogue that helps us express the importance of position, overall strength, and power. As the athletes become proficient here we will begin to move into our Staggered and Single Leg accelerations.
The Single Leg Acceleration is a great opportunity to focus on unilateral power. In our programing this tends to land around the same time that we program single leg box jumps. By doing so, the athlete has great context for the feeling of the movement as well as practice in a more comfortable, upright position prior to getting onto the track. Just as we did in previous accelerations, we will emphasize extension through the backside leg and proper position in each phase of the movement. This position also gives us the opportunity to discuss the shin angle in context to the rest of the body. Often our athletes will attempt to maintain a high center of gravity in this position in order to create greater stability. This causes them to create excessive flexion at the hips and limited flexion at the ankle and knee. When this happens they begin to look like a “T”, with a vertical leg and horizontal torso. At this point we are able to discuss the importance of the shin angle and matching the shin angle to that of the torso. Again, this is a great opportunity to promote proprioceptive awareness and control.
Following the Single Leg acceleration, we will move to the Kneeling acceleration. The kneeling series forces the athletes into a position of greater knee and hip flexion which then creates a mechanical disadvantage at both joints by lengthening the lever arm. As the athletes approach a position below 90 degrees of flexion at the knee they are creating a position that requires greater strength and power to exit from. This acceleration series will also give me several positions to start from including: Top Down Kneeling, Bottom Up Kneeling, and Lateral Top Down Kneeling.
From the Kneeling acceleration series we will move into a variety of prone and supine accelerations to work on the ability to organize the body in order to accelerate quickly.
From the acceleration progression outline in this article I hope you can better understand how I meticulously incorporate drills based on the feedback I receive as well as the ability of the athletes to handle and control each position. Each of these drills has a specific intent to elicit a specific movement, or test and athletes ability to find a position, harness strength or express power through a specific pattern.
I hope through seeing these drills you can visualize where your athletes need to be in the progression and what drills would aid them in their development based on the feedback you are receiving from them.